
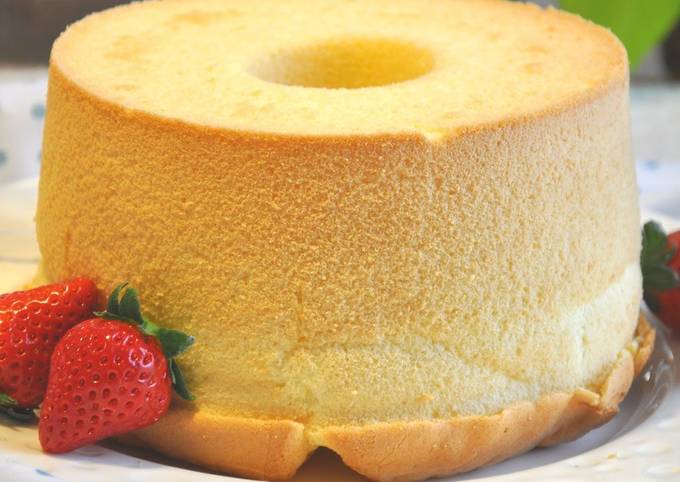
Heavenly Chiffon Cake (with Lots of Tips)
I don't like very moist steamed-pudding type textures, so I made a light and airy chiffon. I couldn't take photos of all the steps, but I always remove the mold by hand. I think that's the best way to do it.
Making a successful chiffon cake depends on the meringue. As long as the meringue is properly made, you don't need baking powder. Once you get used to making meringue, you can do it in less than 10 minutes. This cake is not that sweet, so add more sugar if you like. (Recipe by La Land)
Ingredients
-
160 grams egg white
-
40 grams castor sugar
-
5 grams cornstarch
-
1 grams lemon juice (or salt)
-
65 grams egg yolk
-
20 grams castor sugar
-
30 grams vegetable oil
-
45 grams milk (or water)
-
70 grams cake flour
Cooking Instructions
-
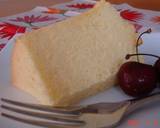
1
This moist, finely textured crumb is like silk.
-
2
Preparation: bring the milk and egg yolks to room temperature. Leave the egg whites in the refrigerator until it's ready to use. Sift the flour, and then mix with a whisk.
-
3
*Tip 1: The reason for mixing the sifted flour with a whisk it to incorporate plenty of air. It's just like sifting it twice, but easier.
-
4
*Tip 2: Eggs vary in size, so in order to create the same cake reliably every time, I weigh them.
-
5
Put a baking sheet in the oven, and preheat to 340°F/170°C.
-
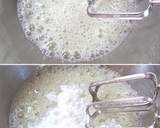
6
To make the meringue: Beat the egg whites lightly with a handheld egg beater, then add all the sugar.
-
7
*Tip 3: The reason for adding the sugar all at once is to make it absorb as much of the moisture of the egg whites as possible, to create a soft, finely textured and sturdy meringue.
-
8
*Tip 4: It takes more time to whisk than adding the sugar in batches, but you can create a very finely textured, high quality meringue this way.
-
9
Start beating the egg whites and sugar at high speed, until the meringue forms very soft peaks.
-
10
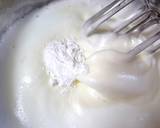
Add the cornstarch (or lemon juice). Beat at low speed to incorporate it evenly.
-
11
*Tip 5: Cornstarch absorbs the moisture of the egg whites and stabilizes the foamy texture of the meringue.
-
12
*Tip 6: Lemon juice and salt also make the meringue finely textured and stable.
-
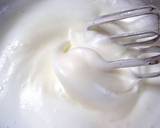
13
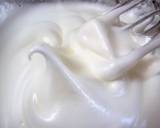
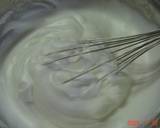
When the meringue forms soft peaks as shown here, it's good.
-
14
*Tip 7: If you beat the meringue for too long so that it forms very stiff peaks, it's hard to incorporate the rest of the ingredients, and you end up losing some of the bubbles.
-
15
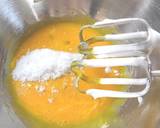
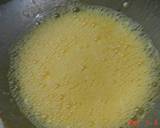
Make the yolk batter: Beat the yolks lightly to break them up, and add all the sugar at once. Mix in low speed until the sugar is incorporated into the yolks.
-
16
*Tip 8: There's no need to whisk it until it's pale and thick. You'll lose the incorporated air when you add the oil and milk anyway.
-
17
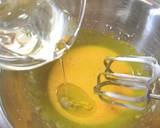
Add the oil, and beat it in.
-
18
Add the milk, and mix it in also.
-
19
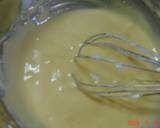
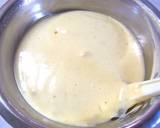
If everything is well mixed as shown here, it's good.
-
20
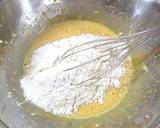
Mix up the flour with a whisk again to incorporate more air, then add all the yolk batter. Mix with a whisk until it is no longer floury.
-
21
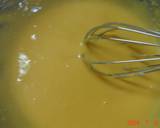
When the batter is smooth and thick as shown here it's done. Chiffon batter has a high moisture content, so you can beat it hard.
-
22
*Tip 9: Unlike regular spongecakes, if you beat it very well and develop the gluten in the flour, the cake will be not only be soft, it will be nice and bouncy too.
-
23
Mix up meringue with a whisk to incorporate any water, which may have seeped out.
-
24
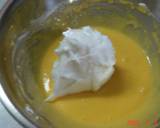
Put a scoop of meringue into the batter and mix it in well with a whisk. Don't worry about the air bubble disappearing.
-
25
*Tip 10:The first addition of meringue is a sacrifice, in order to make it easier to incorporate the rest into the batter.
-
26
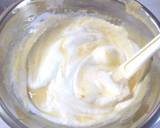
It looks like this.
-
27
Change to a rubber spatula. Add 1/3 of the remaining meringue, and fold it in to the batter, scooping up from the bottom. and turning the bowl.
-
28
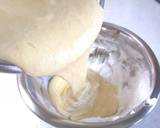
When it's just about mixed, incorporate 1/2 of the remaining meringue in the same way. Finally, add the batter into the bowl with the rest of the meringue.
-
29
*Tip 11: From the 2nd addition of meringue onwards, work carefully so as not to lose the air bubbles as much as possible.
-
30
The batter now looks like this. It's smooth, shiny and airy.
-
31
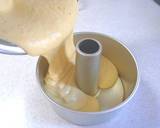
Pour the batter into the cake tin from about a 15cm height. If you pour it from too high up, you'll create big air bubbles.
-
32
Hold the cake tin from both sides with the bottom on the countertop, and rotate it back and forth to smooth out the surface. Don't hit the tin on your work surface as other cake recipes dictate.

-
33
*Tip 12: Hitting the cake tin onto a hard surface to eliminate air bubbles works for sturdy cake batters, but it doesn't work well for light batters, very creamy batters or batters with added ingredients like chocolate chips.
-
34
*Tip 13: With a very light soft batter like this one, even the smallest shock will pop some of the small bubbles, and you may even end up introducing large bubbles.
-
35
Put the cake in the oven and bake.
-
36
I baked the cake for 27 minutes. The texture is moist and amooth, just like chiffon.
-
37
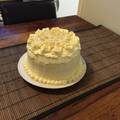
*Tip 14: If you bake it for 30 minutes, check for doneness with a bamboo skewer. If it comes out clean, it's well baked and stable, so you can cover it with whipped cream.
-
38
*Tip 15: If you want to add fruits or chestnut cream after covering the cake with whipped cream, bake for 30 minutes at 360°F/180°C. You'll have a firm cake that can withstand all that weight on top.
-
39
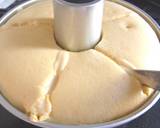
8 minutes into the baking time, take the cake out and make 5 1cm deep cuts spaced evenly over the surface of the cake. This ensures that the cake will rise nice and evenly.
-
40
*Tip 16: This method is useful for ensuring that the cake cooks evenly too, especially when you want a firm texture.
-
41
*Tip 17: By taking it out of the oven you are cooking the cake that is just starting to rise, so it's important to work quickly.
-
42
*Tip 18: If this seems too difficult or rushed for you, or if you have a difficult batter to deal with such as a thin or very creamy one, just skip this step.
-
43
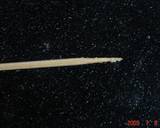
27 minutes into baking, if you poke the cake with a skewer, little bits of the sponge are on it. This is fine.
-
44
*Tip 19: It's often written that if the skewer comes out clean the cake is done, but this actually means the cake is overdone. The best method is to take it out just before the skewer comes out clean, and to let the cake continue cooking with residual heat.
-
45
*Tip 20: If you let it bake for 30 minutes, the skewer will come out clean.
-
46
** NOTE: If you're using a 20 cm diameter cake tin, bake for 37 to 40 minutes at 340°F/170°C. It will puff up a lot, so be careful not to let it burn.
-
47
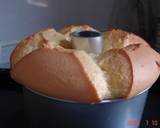
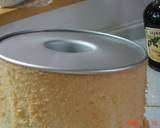
To prevent the cake from shrinking, drop the cake tin onto a counter top lined with a kitchen towel from about 15cm to eliminate the hot air.
-
48
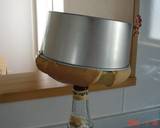
Cool the cake upside down. When the tin is just a little warm when you touch it, put the whole thing in a plastic bag and leave to rest overnight.
-
49
*Tip 21: By letting it rest overnight, the flavors will blend together. It's delicious when it's freshly baked, but it may taste too sweet or not sweet enough.
-
50
*Tip 22: By resting the cake, the texture will firm up, so it becomes harder to mess up when removing the cake from the tin.
-
51
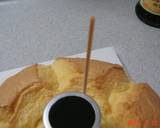
Remove the cake from the tin. Insert a knife in between the cake and the tin, make a small gap and go around once with the knife while moving it up and down.
-
52
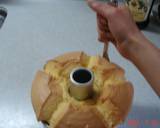
Go around the funnel in the middle with a metal or bamboo skewer, moving up and down while scraping against the funnel wall.
-
53
Grab the funnel and invert the cake. Support the cake with the hand holding the funnel. Insert a knife between the bottom and the cake, and go around once while scraping against the bottom.
-
54
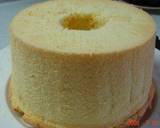
Remove the hand that's holding on to the funnel, and it's done.
-
55
*Tip 23: The reason for using milk even though it's a plain chiffon cake is because the natural sweetness and fragrance of the milk softens the eggy-ness, and makes the cake taste delicious.
-
56
*Tip 24: If you are using water, use less than the milk. 10% of the milk volume is fat, which tends to toughen the crumb, so more milk is used than water.
-
57
*Tip 25: Castor sugar (sugar or 'baker's sugar') absorbs and retains moisture well, so it mixes well in batters and helps to create a cake that stays moist for a long time.


Comments