
Veggie Pizza: Yes... it's a cauliflower crust!!
So, I learned about the cauliflower pizza crust trend almost 2 years ago. At first glance, this recipe will seem like a lot of steps, however, you get quicker and better at it as you make more of them. I am also detoxing my system over the next couple of days and this dish just sings to me (and my liver).
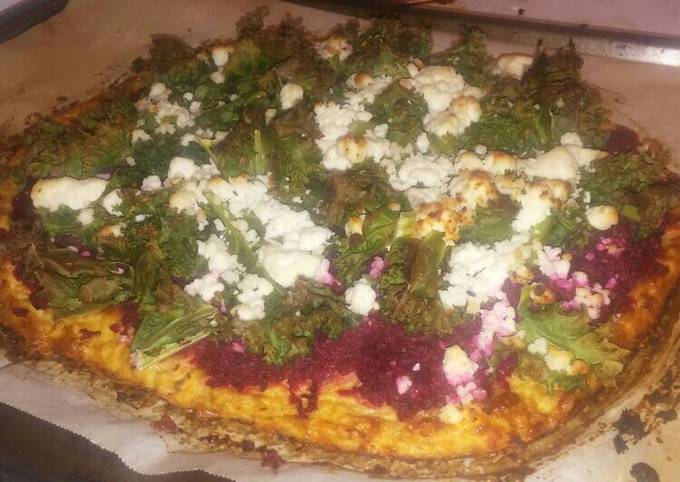
As for the toppings... I love beets so I made a beet pesto, added kale (although I never eat it) and goat cheese. I saw this collaboration of toppings in a magazine once. The colors alone make this pizza very attractive.
Snap! It turned out to be really good. It is also a great "light" meal... not as heavy as pizza can be. I will warn you that I have yet to find a child that wants to even try it. So, unless your little minions are fans of these toppings... This will more than likely be an "adult" dish. However, you can still put whatever toppings they like and I would bet money that they won't have a clue that they are "veggin'" it up! LOL.
Final Note: Please pay attention to the cauliflower notes below. It is key that you do... The success of your pizza rides on it.
As usual... enjoy!
Ingredients
-
pizza crust:
-
1 head cauliflower
-
1 egg
-
1/2 cup - grated parmesan cheese
-
1 tsp. minced garlic
-
to taste Salt & Pepper
-
--------------------------
-
beet pesto:
-
1 large beet
-
2 cloves minced garlic
-
2 tbsp. - lemon juice
-
1 tbsp. - olive oil
-
1/2 cup - grated parmaesan cheese
-
---------------------------
-
toppings:
-
1 cup kale (roughly chopped)
-
1 cup beet pesto
-
3/4 cup (+/-... Your choice) of crumbled goat cheese
-
----------------------------
Cooking Instructions
-
1
Before proceeding with the recipe, you will have to roast a large beet by cutting it into cubes (approx. 6 to 8 cubes) and loosely wrap it in aluminum foil... oh drizzle with a small amount of olive oil. Bake at 375 degrees for 50-60 minutes. Let cool.
-
2
Once you pull the beet from the oven, kick the temperature up to 450 degrees.
-
3
For the crust... Break up the head of cauliflower into large chunks and steam for about 15 minutes. A fork should be able to easily puncture it. Using your food processor, mash up the cauliflower so that it looks similar to thick grits or pollenta.
-
4
Pour cauliflower onto a stack of at least 5 or 6 paper towels and apply an additional 5+ paper towels on top.
-
5
Using your hands, press down on the cauliflower so that the towels absorbs the water. Continue to change out the wet paper towels until they are no longer getting wet during the pressing process.
-
6
Once you have pressed as much moisture out of your cauliflower as possible, put it in a large mixing bowl. Add the egg and remaining ingredients and mix.
-
7
Place the cauliflower mixture onto a baking or pizza sheet lined with parchment paper and flatten with your hands while shaping it to size of your pizza. NOTE: This crust doesn't rise like usual dough, so what ever thickness and shape you create, will be the same once it comes out of the oven.
-
8
Salt & Pepper to taste (optional) and bake for about 15 minutes or until it has established a light golden brown color.
-
9
While the crust is in the oven, make the beet pesto. NOTE: You can use any kind of base sauce you want.... red, basil pesto, etc. I just prefer this one. :-)
-
10
For the pesto.... Place all of the ingredients listed above into your food processor and let her rip!
-
11
Once the crust is done, carefully remove from the oven, reduce heat to 415 degrees and top with the beet pesto, kale and goat cheese.
-
12
Bake for an additional 15 minutes. I just pay attention to the coloring of the cheese...a golden brown across the top is perfect. Serve while it's hot.
-
13
FINAL NOTE: If you have never made a cauliflower crust before, I don't recommend baking this dish for guests on your first attempt. Making this sort of crust may take a little practice, but is soooo worth it. JUST REMEMBER TO REMOVE AS MUCH MOISTURE AS POSSIBLE DURING THE PRESSING PROCESS. THAT IS KEY.
Reactions
Cooksnaps
Did you make this recipe? Share a picture of your creation!


Comments